Knife sharpening angle guides are essential for maintaining consistency and precision. They help achieve optimal edge geometry, whether using commercial tools or DIY solutions.
1.1 Importance of Proper Sharpening Angles
Proper sharpening angles are crucial for achieving a sharp, durable edge. They balance sharpness and longevity, preventing the knife from becoming too delicate or dull. Different knives require specific angles, such as 15-20 degrees for straight razors and 20-30 degrees for chef knives. Maintaining consistency ensures optimal performance, making angle guides indispensable for precise sharpening. Incorrect angles can lead to uneven edges and reduced knife life, emphasizing the need for accurate guidance during the sharpening process.
1.2 Overview of DIY Angle Guides
DIY angle guides offer a cost-effective solution for precise knife sharpening. Simple materials like paper or plastic can be used to create adjustable or fixed-angle templates. These guides help maintain consistent sharpening angles, ensuring optimal edge geometry. They are customizable to suit specific knife types and user preferences, providing a practical alternative to commercial tools. Making your own guide allows for experimentation and refinement, enhancing sharpening skills and knife performance.
Understanding Knife Sharpening Angles
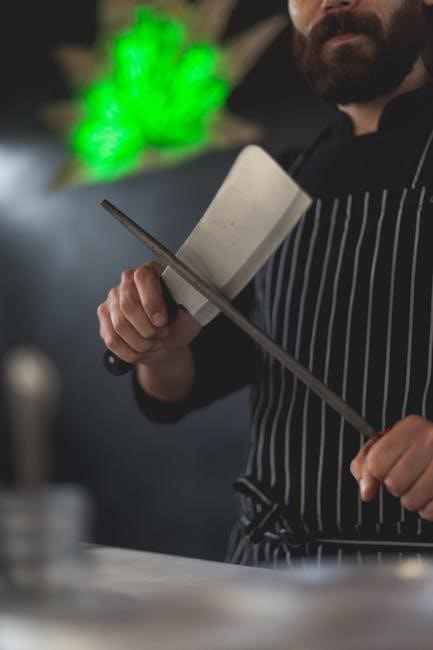
The sharpening angle is the angle between the knife blade and the sharpening surface. Common angles range from 10 to 30 degrees, balancing sharpness and durability;
2.1 What is a Sharpening Angle?
A sharpening angle is the degree at which the knife blade meets the sharpening surface. It ranges from 10 to 30 degrees, with 20 degrees being common for most knives. This angle determines the balance between sharpness and edge durability. A lower angle creates a sharper edge but may be more delicate, while a higher angle enhances durability. Proper angle selection is crucial for optimal knife performance and longevity.
2.2 Factors Influencing the Sharpening Angle
The sharpening angle is influenced by the knife’s type, intended use, and edge geometry. Straight razors require lower angles for sharpness, while outdoor knives need higher angles for durability. Personal preference also plays a role, as some users prioritize sharpness over edge longevity. Understanding these factors helps in selecting the ideal angle for specific tasks, ensuring the knife performs optimally in its intended application.
2.3 Common Sharpening Angles for Different Knives
Common sharpening angles vary by knife type. Straight razors typically use 10-15 degrees for sharpness, while chef knives often range between 20-30 degrees. Outdoor knives may use 25-30 degrees for durability. These angles balance sharpness and edge retention, ensuring optimal performance for specific tasks. Understanding these standards helps in creating precise angle guides tailored to different knife applications and user preferences.
Materials and Tools Needed
Essential materials include plastic, wood, or metal for the guide. Tools like a ruler, protractor, sandpaper, and marker are necessary for precise measurements and smooth fabrication.
3.1 Materials for the Angle Guide
Common materials for angle guides include durable plastics, wood, or metal. Plastic is lightweight and easy to shape, while wood offers a natural, customizable option. Metal provides long-lasting durability. Additional materials like sandpaper, markers, and adhesive or screws are necessary for assembly and precision. These materials ensure the guide is both functional and tailored to your sharpening needs.
3.2 Tools Required for Fabrication
A saw or cutter is needed for cutting materials to size. Sandpaper is essential for smoothing edges. A ruler or straightedge ensures straight lines, while a marker or pencil marks measurements. A drill with small bits can add holes for adjustable features. A protractor helps in marking precise angles. Files and clamps are optional but useful for refining shapes and securing the guide during fabrication.
3.3 Optional Materials for Customization
Optional materials for customization include rubber backing for stability, a protective cover for storage, or decorative finishes like paint or varnish. Adding a marker holder or sandpaper holder enhances utility. A hinge or adjustable screw allows for customizable angles. These additions improve functionality and durability, making the guide more versatile for various sharpening needs while maintaining precision and ease of use.

Designing the Angle Guide
Designing the angle guide involves creating a precise template to ensure accuracy. Adjust the dimensions to suit your sharpening needs, and consider adding markings for common angles. A simple protractor can help verify measurements, ensuring the guide aligns perfectly with your knife’s edge for consistent sharpening.
4.1 Creating a Template
Start by sketching a design on paper, ensuring accurate angle measurements. Use a protractor to mark common sharpening angles, such as 20°, 25°, or 30°. Transfer the design to your chosen material, like metal or plastic, using a ruler or compass for precision. Include alignment marks to fit various knife widths. This template will serve as the foundation for your guide, ensuring consistency and ease of use during sharpening sessions.
4.2 Adjustable vs. Fixed-Angle Designs
Adjustable designs offer versatility, allowing users to sharpen knives at multiple angles, ideal for various blade types. Fixed-angle guides provide simplicity and durability, perfect for consistent sharpening. Choose adjustable for flexibility or fixed for ease of use. Both designs ensure precision, catering to different sharpening needs and preferences, making them valuable additions to your knife maintenance toolkit.
Making the Angle Guide
Trace your design, cut precisely, and sand edges for smoothness. Mark angle measurements clearly to ensure accuracy and consistency during sharpening sessions.
5.1 Tracing and Cutting the Guide
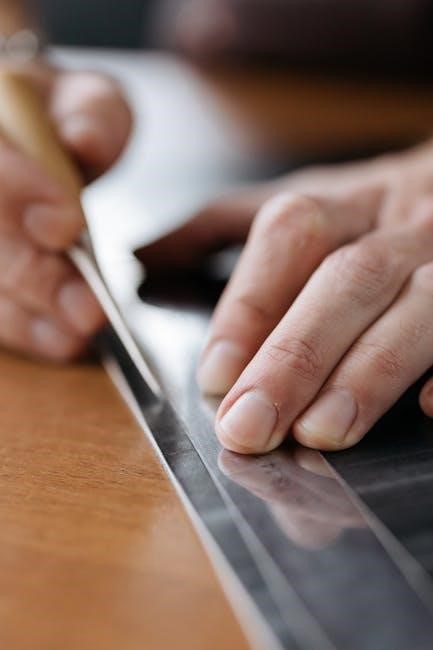
Begin by tracing your template onto the material with a marker. Cut out the guide using scissors, a craft knife, or a saw. Sand the edges for smoothness. Ensure the guide aligns with your knife’s edge. For precision, fold paper to create a makeshift angle marker. This step ensures your guide is both functional and tailored to your sharpening needs. Maintain consistent pressure during cutting for clean edges.
5.2 Sanding and Smoothing the Edges
Use progressively finer grit sandpaper to smooth the guide’s edges. Start with coarse grit for shaping, then switch to finer grits for polishing. Sand in one direction to avoid creating scratches. After sanding, use a marker to check for evenness. If burrs remain, lightly sand until smooth. This ensures the guide glides effortlessly during sharpening, maintaining precise angles and preventing damage to the knife edge. Regularly inspect and smooth edges for optimal performance.
5.3 Marking the Angle Measurements
Use a protractor to accurately mark the desired sharpening angles on the guide. Common angles range from 15° to 30°, with 20° being ideal for most knives. Mark both sides of the guide for consistency. Ensure the measurements are clear and precise, as this step is crucial for accurate sharpening. Double-check the markings to avoid errors. For customization, additional angles can be marked for specific knife types, enhancing versatility and precision during use.

Testing the Angle Guide
Test the angle guide by sharpening a knife and checking the edge consistency. Ensure the guide holds the correct angle and adjust if necessary for optimal results.
6.1 Verifying Accuracy
Verifying the accuracy of your angle guide is a critical step. Start by sharpening a knife and inspecting the edge for consistency. Use a marker or magnifying tool to check if the angle matches your target. Repeat the process on multiple knives to ensure reliability. If the edge appears uneven, adjust the guide slightly and test again. This step ensures your guide delivers precise results every time, making it a valuable tool for sharpening.
6.2 Adjustments for Precision
After verifying accuracy, fine-tune your angle guide by loosening the adjustment screws and repositioning the template. Use a marker to check the edge alignment and ensure it matches your desired angle. Test the guide on multiple knives to confirm consistency. If needed, lightly sand the edges for smoother alignment. Proper adjustments ensure your guide delivers precise results, enhancing the sharpening process and extending the life of your knives.
Using the Angle Guide
Using an angle guide ensures consistent sharpening by maintaining the desired edge geometry. It simplifies the process, making it easier to achieve precise results for any knife type.
7.1 Sharpening Freehand with the Guide
Sharpening freehand with a guide allows for precise angle control. Align the knife with the guide, maintaining consistent strokes on the whetstone. This method ensures optimal edge geometry and sharpness. Regularly check progress to avoid over-sharpening. The guide helps maintain the desired angle, making the process efficient and effective for achieving razor-sharp results consistently.
7.2 Maintaining Consistency
Maintaining consistency is crucial for achieving a sharp, durable edge. Use the guide to ensure the same angle on both sides of the blade. Regularly inspect the knife’s edge under light to monitor progress. Apply consistent pressure and stroke direction to avoid unevenness. Over-sharpening can reduce the knife’s lifespan, so stop when the desired sharpness is reached. Consistency ensures reliability and extends the knife’s functional life.
Tips for Precise Sharpening
Use consistent angles and light strokes. Regularly inspect the edge and avoid over-sharpening. These techniques ensure precision and extend the knife’s lifespan.
8.1 Monitoring Progress
Monitoring progress during sharpening ensures optimal results. Use a marker to track the edge’s improvement. Regularly inspect the knife under light to check sharpness and evenness. Adjust your technique as needed to maintain consistent angles. This step-by-step approach helps in achieving a razor-sharp edge while avoiding over-sharpening, which can reduce the knife’s lifespan unnecessarily. Consistency is key to precision sharpening.
8.2 Avoiding Common Mistakes
Avoiding common mistakes is crucial for effective sharpening. Ensure consistent angle maintenance to prevent uneven edges. Over-sharpening can reduce knife lifespan, so monitor progress carefully. Keep the bevel aligned with the guide to avoid drifting. Using the wrong angle for the knife type can compromise sharpness or durability. Regular inspection and adjustments will help maintain precision and avoid costly errors during the sharpening process.
Troubleshooting Common Issues
Identify uneven edges by inspecting the blade. Adjust the angle guide to ensure even contact. Verify the guide’s alignment and stability to prevent angle drift during sharpening.
9.1 Correcting Uneven Edges
To correct uneven edges, inspect the blade under light to identify inconsistencies. Adjust the angle guide to ensure even contact across the edge. Lightly sharpen the higher side first, then blend both sides for uniformity. Use a marker to track progress and maintain consistent strokes. Repeat until the edge is even and razor-sharp, ensuring optimal performance and durability.
9.2 Addressing Angle Drift
Angle drift occurs when the knife deviates from the intended sharpening angle. To correct this, inspect the guide for proper alignment and ensure the knife is held firmly. Use a marker to visually track the edge and adjust strokes as needed. Alternate sharpening sides to maintain balance, and check progress frequently. Consistent practice and attention to detail will help mitigate angle drift and improve sharpening accuracy over time.
Creating a knife sharpening angle guide enhances consistency and precision, offering a custom solution for knife maintenance. It ensures sharpness and durability, making sharpening easier and more effective over time.
10.1 Summary of Key Steps
Plan the design based on knife type and sharpening needs. Create a precise template with desired angles. Cut and sand the guide for smooth edges. Mark clear angle measurements. Test the guide for accuracy and make adjustments as needed. Ensure consistency during sharpening to achieve durable, sharp edges. This process enhances sharpening precision and maintains blade performance effectively.
10.2 Final Thoughts on DIY Angle Guides
Creating a DIY angle guide is a rewarding project that ensures precise sharpening. It allows customization to your specific needs, enhancing knife performance. Consistent angles mean a sharper, more durable edge. Balancing sharpness and durability is key. With a homemade guide, you maintain control over the process, leading to better results. Give it a try and elevate your sharpening skills for consistent, professional-grade edges every time.
Additional Resources
For further learning, explore EthanC’s tutorials and sharpeningsupplies.com. Tools like Beston 500 grit whetstones and Suehiro Cerax 700 grit are highly recommended for precision sharpening.
11;1 Recommended Tools and Materials
For precise sharpening, consider Beston 500 grit and Suehiro Cerax 700 grit whetstones. A Knifewear Angle Guide or homemade folded paper guide can aid accuracy. Optional materials include sharpening towels and antler handles for customization. These tools enhance efficiency and edge quality, catering to both beginners and experienced sharpeners.
11.2 Further Reading and Tutorials
For in-depth learning, explore tutorials like EthanC’s Patreon videos and Nathans’ kitchen knife sharpening guide. Websites like sharpeningsupplies.com offer detailed blogs and videos on angle techniques. Additional resources include whetstone reviews and step-by-step guides for homemade angle guides. These materials provide comprehensive insights for mastering knife sharpening skills and maintaining edge precision.