JVC Stereo Car Manual: A Comprehensive Guide
Discover essential guidance for your JVC car stereo, covering operations, troubleshooting, and maintenance – ensuring optimal audio performance and a seamless driving experience.
JVC has a long-standing reputation for delivering high-quality car audio systems, blending innovative technology with user-friendly designs. These stereos cater to a diverse range of drivers, from those seeking basic audio functionality to enthusiasts desiring advanced features like smartphone integration and premium sound customization. Understanding the core components and capabilities of your JVC head unit is crucial for maximizing your in-car entertainment experience.
Modern JVC car stereos often include features such as Bluetooth connectivity for wireless audio streaming and hands-free calling, USB inputs for playing digital music files, and compatibility with Android Auto and Apple CarPlay for seamless smartphone integration. Many models also boast powerful amplifiers, equalizer settings, and various sound processing technologies to enhance audio clarity and fidelity. This guide will help you navigate the complexities of your JVC stereo, ensuring you get the most out of its features.
Understanding JVC Head Unit Models
JVC categorizes its head units into distinct series, each offering a specific set of features and price points. The KD-Series typically represents entry-level options, providing essential functions like AM/FM radio, CD playback, and Bluetooth connectivity. Stepping up, the KW-Series introduces wireless mirroring capabilities for smartphones, enhancing convenience and safety.
The premium DD-Series boasts advanced features such as high-resolution audio playback, sophisticated sound processing, and often includes a larger touchscreen display. Within each series, models vary in terms of power output, pre-amp voltage, and the number of available features. Identifying your specific model number – usually found on the front panel or the unit’s packaging – is vital for accessing the correct manual and support resources. Knowing your model allows for targeted troubleshooting and feature exploration.

Locating Your JVC Car Stereo Manual
Finding the correct manual for your JVC car stereo is crucial for understanding its features and resolving any issues. Start by checking the original packaging – many units include a printed quick-start guide and instructions for downloading the full manual. If you’ve misplaced the physical documentation, the JVC official website is the primary resource.
Alternatively, numerous third-party manual archives host a vast collection of user manuals, often searchable by model number. When searching online, be precise with your model number to avoid downloading an incorrect manual. Ensure the downloaded file is from a reputable source to protect your device from potential malware. A readily available manual empowers you to maximize your JVC stereo’s capabilities and address any operational concerns effectively.
Online Manual Resources
Numerous online platforms offer convenient access to JVC car stereo manuals, streamlining the process of finding the information you need. ManualsLib and ManualsOnline are popular repositories, hosting a wide range of models and documentation. These sites typically allow searching by model number, making it easier to pinpoint the correct manual for your specific unit.
Beyond dedicated manual archives, the Internet Archive can sometimes contain older or discontinued model manuals. Always verify the manual’s authenticity and relevance to your stereo’s model number before relying on its instructions. Utilizing these online resources provides a quick and accessible way to troubleshoot issues, understand features, and optimize your JVC car stereo experience without needing physical documentation.
JVC Official Website Manual Downloads
The JVC official website serves as the primary and most reliable source for downloading car stereo manuals. Navigating to the support or downloads section of the JVC website allows users to search for manuals by model number or browse through categorized listings. JVC typically provides manuals in PDF format, ensuring compatibility across various devices and operating systems.
Downloading directly from the source guarantees access to the latest version of the manual, including any updates or revisions. Furthermore, the official website often includes additional resources such as firmware updates, troubleshooting guides, and frequently asked questions. Utilizing the JVC official website ensures you have accurate and up-to-date information for your specific car stereo model, maximizing its functionality and lifespan.
Third-Party Manual Archives
While the JVC official website is preferred, several third-party websites archive car stereo manuals, offering alternatives when the official source is unavailable or difficult to navigate. These archives often compile manuals from various manufacturers, including JVC, creating a centralized repository for older or discontinued models. However, users should exercise caution when downloading from these sources, verifying the file’s authenticity and safety to avoid potential malware.
Popular third-party manual archives include ManualsLib and similar platforms dedicated to collecting user manuals. It’s crucial to confirm the manual corresponds to your exact JVC stereo model number to ensure accuracy; Remember that manuals found on third-party sites may not be the latest versions, potentially lacking updated information or features. Always prioritize the official JVC website when possible.

Basic Operations & Features
Master fundamental controls: power, volume, radio tuning, CD playback, and utilizing USB/Aux inputs for a straightforward audio experience in your vehicle.
Powering On/Off and Volume Control
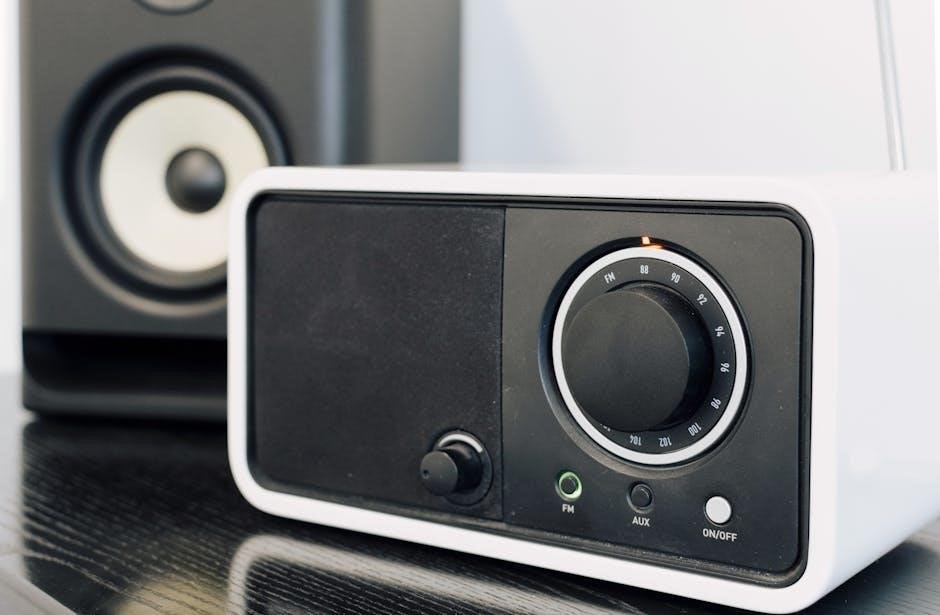
Initiating your JVC car stereo is typically achieved by pressing the dedicated power button, often clearly labeled with a power symbol. A single press usually activates the unit, while another press will power it down. Some models may feature an automatic power-on function when the car ignition is turned on.
Volume adjustment is equally straightforward. A rotary knob is the most common method, allowing for precise control by simply turning it clockwise to increase the volume and counter-clockwise to decrease it. Many JVC head units also incorporate steering wheel controls for volume, offering convenient access without taking your hands off the wheel. Digital volume controls, displayed on the screen, are also prevalent in newer models, allowing for numerical adjustments and precise settings. Remember to start with a low volume and gradually increase it to a comfortable listening level to protect your hearing and avoid startling yourself.
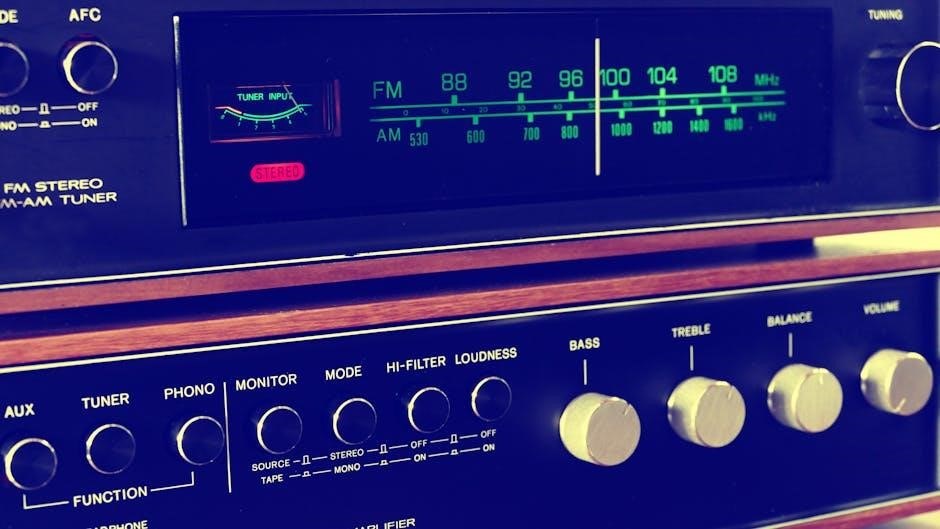
Tuning to Radio Stations (AM/FM)
Accessing radio functionality on your JVC stereo begins by selecting the “Radio” or “Tuner” source option, usually via a dedicated button or a menu selection on the head unit’s display. Once selected, you can switch between AM and FM bands using the “AM/FM” button.
Tuning can be accomplished in several ways. The traditional method involves pressing the “Tune Up” or “Tune Down” buttons to scan for the next available station. Many JVC stereos also feature “Seek” mode, which rapidly scans for the strongest signal. For precise tuning, utilize the “Manual Tune” option, allowing for incremental adjustments. Preset stations can be stored for quick access; typically, you press and hold a numbered preset button while tuned to the desired station. Regularly updating presets ensures you always have your favorite stations readily available. Signal strength indicators on the display help optimize reception.
CD Player Operation
Initiating CD playback on your JVC stereo involves inserting a compatible disc, label-side up, into the CD slot. The unit will automatically recognize the disc and display track information. Use the “Play/Pause” button to start or halt playback. The “Stop” button completely halts the CD and ejects it after a brief delay.
Navigation through tracks is achieved using the “Next/Skip” and “Previous/Rewind” buttons. Many JVC models offer scan, repeat (one track or all tracks), and random play modes, accessible via dedicated buttons or menu options. The display typically shows track number, elapsed time, and remaining time. Ensure discs are clean and free of scratches for optimal performance. If a disc is unreadable, the unit will display an error message; attempting to play damaged discs repeatedly may cause further issues.
USB/Auxiliary Input Usage
Connecting devices via USB or auxiliary input expands your audio sources. Locate the corresponding port on your JVC head unit – typically on the front panel. For USB, insert a compatible USB drive containing MP3, WMA, or WAV files. The stereo will automatically detect the device and allow track selection using the head unit’s controls.
Auxiliary input (often a 3.5mm jack) accepts audio from smartphones, MP3 players, or other devices using a standard audio cable. Select the “AUX” source on your JVC stereo. Volume control is managed through both the connected device and the head unit. Ensure cables are securely connected to avoid audio interruptions. Some JVC models support charging connected USB devices, while others do not; consult your specific model’s manual for details.

Advanced Features & Settings
Explore Bluetooth pairing, smartphone integration, and detailed sound customization options within your JVC stereo, unlocking a personalized and enhanced audio experience.
Bluetooth Connectivity & Pairing
Establishing a Bluetooth connection with your JVC car stereo allows for hands-free calling and wireless audio streaming from compatible smartphones and devices. To initiate pairing, navigate to the Bluetooth settings menu on your head unit – typically found within the ‘Settings’ or ‘Phone’ section. Ensure your smartphone’s Bluetooth is enabled and set to discoverable mode.
The JVC stereo will then scan for available devices. Select your smartphone from the list displayed on the head unit. You may be prompted to enter a PIN or confirm a pairing code on both devices; typically, this is ‘0000’ or a randomly generated code. Once successfully paired, your smartphone will be stored in the stereo’s Bluetooth device list for future automatic connections.
Troubleshooting pairing issues often involves deleting previously paired devices from both the stereo and smartphone, then repeating the pairing process. Interference from other Bluetooth devices can also hinder connection; try moving away from potential sources of interference. Refer to your specific JVC model’s manual for detailed instructions and troubleshooting steps.
Smartphone Integration (Android Auto/Apple CarPlay)
JVC car stereos with Android Auto and Apple CarPlay offer seamless smartphone integration, mirroring your phone’s interface onto the head unit’s display. This allows access to navigation, music, communication, and compatible apps directly through the stereo. To use these features, a compatible smartphone and a USB connection are generally required, though some newer models support wireless CarPlay.
Connecting your Android phone for Android Auto involves downloading the Android Auto app and connecting via a high-quality USB cable. For Apple CarPlay, ensure your iPhone is updated to the latest iOS version. The stereo will prompt you to accept terms and conditions on your phone. Once connected, the respective smartphone interface will appear on the JVC display.
Troubleshooting connection issues often involves using a different USB cable, ensuring the cable is securely connected, and verifying compatibility with your smartphone model. Refer to your JVC stereo’s manual for specific instructions and troubleshooting guidance related to Android Auto and Apple CarPlay.
Equalizer and Sound Settings
JVC car stereos provide extensive equalizer (EQ) and sound settings to customize the audio experience to your preferences and vehicle’s acoustics. Most models feature preset EQ curves – such as Rock, Pop, Jazz, and Flat – offering quick adjustments for different music genres. Beyond presets, a manual EQ allows fine-tuning specific frequency bands for precise sound shaping.
Additional sound settings commonly include Loudness, which boosts bass and treble at lower volumes; Balance and Fader, controlling speaker output distribution; and a Digital Sound Enhancement Engine (DSEE) that upscales compressed audio files. Some JVC units also offer Time Alignment, compensating for speaker distances to create a focused soundstage.
Experimenting with these settings is key to achieving optimal sound quality. Refer to your JVC stereo’s manual for detailed explanations of each setting and guidance on how to adjust them effectively. Careful adjustment can dramatically improve clarity, depth, and overall listening enjoyment.
Steering Wheel Control Setup
Maintaining control of your JVC stereo while keeping your hands on the wheel is a significant safety feature. Many JVC head units are compatible with vehicle steering wheel controls, but often require a specific setup process. This typically involves connecting an additional adapter interface between the stereo and the vehicle’s wiring harness.
The setup procedure varies depending on the vehicle make and model. The JVC manual provides detailed instructions, often requiring a learning mode where the stereo recognizes each button’s function. You’ll assign specific stereo functions – like volume, track selection, and source switching – to each steering wheel button.
Proper configuration ensures seamless control. If experiencing issues, double-check the adapter’s wiring connections and repeat the learning process. Some adapters may require software updates for full compatibility. Consulting a professional installer is recommended if you encounter difficulties during setup.
Troubleshooting Common Issues
Resolve frequent problems like power failures, radio static, Bluetooth disconnects, and CD errors with our guide, restoring your JVC stereo’s functionality quickly and efficiently.
No Power to the Unit
Experiencing a complete lack of power to your JVC car stereo is a common frustration. Begin by verifying the vehicle’s main fuse, as a blown fuse can interrupt power supply to the entire system. Next, inspect the JVC stereo’s dedicated fuse, typically located on the back of the unit or within the vehicle’s fuse box – consult your vehicle’s owner’s manual for its specific location.
Ensure all wiring connections are secure, particularly the power and ground wires. A loose connection can prevent the unit from receiving adequate power. Check the wiring harness for any damage or corrosion. If the unit still fails to power on, test the voltage at the power wire with a multimeter to confirm it’s receiving 12V.
Consider if a recent installation or modification might have caused a wiring issue. If you’ve recently installed a new component, double-check its wiring. Finally, if all else fails, the JVC stereo itself may be faulty and require professional repair or replacement.
Radio Reception Problems
Poor radio reception with your JVC car stereo can stem from several causes. First, ensure the antenna is securely connected to the back of the head unit. A loose or damaged antenna cable significantly impacts signal strength. Inspect the antenna itself for any physical damage, such as bends or breaks. If using a powered antenna, verify it’s receiving power.
Consider your location; buildings, tunnels, and remote areas naturally have weaker signals. Try tuning to different stations to see if the issue is localized. Interference from other electronic devices can also play a role. If the problem persists, check the antenna ground connection – a poor ground can reduce reception quality.
For HD Radio reception, ensure the HD Radio feature is enabled in the stereo’s settings. If issues continue, a faulty antenna or radio tuner within the JVC unit might require professional diagnosis and repair.
Bluetooth Pairing Failures
Experiencing difficulties pairing your smartphone with your JVC car stereo via Bluetooth? First, confirm Bluetooth is enabled on both your phone and the head unit. Ensure your phone is in discoverable mode – consult your phone’s manual for instructions. On the JVC stereo, initiate the pairing process through the Bluetooth menu.
If pairing fails, delete any previously paired devices from both your phone and the stereo’s Bluetooth memory. This clears potential conflicts. Bring your phone closer to the JVC unit during pairing. Interference from other Bluetooth devices can sometimes disrupt the connection.
Restarting both your smartphone and the JVC stereo can often resolve temporary glitches. Check for firmware updates for your JVC unit, as these can improve Bluetooth compatibility. If problems persist, consult the JVC support website for specific troubleshooting steps related to your model.
CD Player Errors
Encountering issues with your JVC car stereo’s CD player? Common errors include “No Disc,” “Error,” or discs being rejected. First, ensure the CD is finalized – CDs recorded from a computer must be properly finalized to be readable. Verify the disc is clean and free of scratches, as damaged discs can cause playback problems.
Try a different CD to determine if the issue lies with the disc itself or the player. If multiple discs fail, the laser lens might be dirty. Use a commercially available CD lens cleaner to gently clean the lens – follow the product’s instructions carefully.
Avoid using irregularly shaped or damaged CDs. If the error persists after cleaning and trying different discs, a more serious internal issue may require professional repair. Consult the JVC support website for model-specific error codes and troubleshooting advice.
Maintenance & Care
Preserve your JVC stereo’s longevity through regular cleaning, firmware updates, and timely fuse replacements, guaranteeing consistent performance and optimal audio quality for years.
Cleaning Your JVC Car Stereo
Maintaining a clean JVC car stereo is crucial for both its appearance and functionality. Dust, dirt, and fingerprints can accumulate on the display screen and buttons, hindering visibility and responsiveness. To clean the exterior, always power off the unit first. Use a soft, dry microfiber cloth to gently wipe down the surfaces. Avoid using harsh chemicals, abrasive cleaners, or excessive moisture, as these can damage the finish or internal components.
For stubborn smudges on the display, lightly dampen the microfiber cloth with distilled water – ensuring it’s not dripping wet. Gently wipe the screen, then immediately dry it with a separate, dry portion of the cloth. Pay attention to the crevices around the buttons and knobs, using a slightly dampened cotton swab to reach tight spaces; Regularly cleaning your JVC stereo will help keep it looking its best and functioning smoothly for years to come, enhancing your overall driving experience.
Firmware Updates
Keeping your JVC car stereo’s firmware up-to-date is vital for optimal performance, bug fixes, and access to the latest features. JVC periodically releases firmware updates to improve system stability, enhance compatibility with smartphones, and address potential security vulnerabilities. Check the JVC official website regularly for available updates specific to your head unit model.
The update process typically involves downloading the firmware file to a USB drive, inserting the drive into the stereo, and following the on-screen prompts. Important: Do not interrupt the update process, as this could potentially damage the unit. Ensure your car’s ignition is on during the update, and avoid turning off the stereo or vehicle. Successful firmware updates can significantly improve your JVC stereo’s functionality and user experience, ensuring it remains current with evolving technology.
Fuse Replacement
If your JVC car stereo loses power, a blown fuse is often the culprit. Before replacing the fuse, identify the correct fuse location – typically found in the stereo’s rear wiring harness or the vehicle’s fuse box (consult your vehicle’s owner’s manual). Always disconnect the negative terminal of your car battery before attempting any electrical work.
Once located, carefully remove the blown fuse and replace it with a new fuse of the exact same amperage rating. Using a fuse with a higher amperage can cause serious damage to the stereo and vehicle’s electrical system. After replacing the fuse, reconnect the battery and test the stereo. If the fuse blows again immediately, there may be a short circuit requiring professional attention. Never ignore a repeatedly blown fuse, as it indicates a more significant underlying issue.
Specific Model Series Guides
Explore dedicated resources for JVC KD, KW, and DD-Series stereos, offering tailored manuals and troubleshooting tips for your specific car audio system.
JVC KD-Series Manuals
JVC’s KD-Series represents a popular line of car stereos known for their balance of features and affordability. These head units typically include essential functionalities like AM/FM radio, CD playback, USB and auxiliary inputs, and often Bluetooth connectivity for wireless audio streaming and hands-free calling. Finding the correct manual for your specific KD-Series model is crucial for unlocking its full potential.
KD-Series manuals detail everything from basic operations – powering the unit on/off, adjusting volume, and tuning into radio stations – to more advanced features like customizing the equalizer settings and pairing your smartphone. They also provide valuable troubleshooting guidance for common issues such as no power, poor radio reception, or Bluetooth pairing problems.
These manuals often include diagrams illustrating the unit’s various buttons, ports, and display indicators, making it easier to understand the system’s layout. Detailed explanations of each function ensure users can confidently navigate the stereo’s menus and settings. Regularly consulting your KD-Series manual will help you maximize your listening enjoyment and keep your system running smoothly.
JVC KW-Series Manuals
The JVC KW-Series signifies a step up in features and technology, generally encompassing multimedia receivers with larger touchscreen displays. These units commonly support advanced smartphone integration like Apple CarPlay and Android Auto, providing access to navigation, music, and communication apps directly on the car stereo. KW-Series manuals are essential for navigating these complex systems.
KW-Series documentation thoroughly explains how to connect and utilize smartphone integration features, customize the user interface, and access advanced audio settings. They detail the process of setting up voice control, managing app permissions, and troubleshooting connectivity issues. Manuals also cover traditional functions like radio, CD (if equipped), USB, and Bluetooth.
Understanding the KW-Series manual is vital for maximizing the benefits of its multimedia capabilities. Diagrams illustrate touchscreen controls and menu structures, while detailed explanations guide users through setup and customization. Proper use of the manual ensures a safe and enjoyable in-car entertainment experience, leveraging the full potential of your JVC receiver.
JVC DD-Series Manuals
JVC’s DD-Series typically represents a blend of affordability and essential features, often focusing on 1-DIN or compact 2-DIN head units. These models generally prioritize core functionalities like AM/FM radio, CD playback, USB connectivity, and Bluetooth audio streaming. The DD-Series manuals are crucial for understanding these features.
DD-Series documentation provides clear instructions on basic operations, including tuning to radio stations, navigating USB music libraries, and pairing Bluetooth devices. They detail the use of the unit’s display, button layout, and menu system. Manuals also cover essential settings like equalizer adjustments and volume control.
Mastering the DD-Series manual allows users to fully utilize the stereo’s capabilities, ensuring optimal sound quality and a user-friendly experience. Diagrams illustrate the unit’s connections and controls, while step-by-step guides simplify setup and troubleshooting. Proper reference to the manual enhances the overall enjoyment of your JVC car audio system.