The Honeywell T6 Pro Installation Manual is a comprehensive guide for installing and configuring the T6 Pro Smart Thermostat. It provides step-by-step instructions for professionals and homeowners, ensuring proper setup and functionality. The manual covers essential topics like system compatibility, wiring, and advanced features, helping users optimize their home climate control efficiently.
1.1 Overview of the Honeywell T6 Pro Thermostat
The Honeywell T6 Pro Thermostat is a smart, programmable device designed for efficient home climate control. It offers advanced features like remote access via the Honeywell Home app, scheduling capabilities, and energy-saving modes. The thermostat supports multi-stage HVAC systems and is compatible with various heating and cooling configurations. Its user-friendly interface and robust functionality make it ideal for both residential and light commercial applications, ensuring precise temperature control and enhanced comfort.
1.2 Importance of Proper Installation
Proper installation of the Honeywell T6 Pro Thermostat is crucial for optimal performance, efficiency, and safety. Incorrect wiring or setup can lead to system malfunctions, reduced energy efficiency, and potential safety hazards. Following the manual ensures compatibility with your HVAC system, avoids voiding the warranty, and guarantees reliable operation. Correct installation also enables advanced features like remote access, scheduling, and energy-saving modes, maximizing comfort and cost savings. Always refer to the manual for precise guidance tailored to your system.
Pre-Installation Requirements
Ensure system compatibility with your HVAC setup and verify electrical requirements. Gather all necessary tools and materials, then review the manual for specific preparation steps before starting.
2.1 Checking System Compatibility
Before installation, verify that the Honeywell T6 Pro is compatible with your HVAC system. Check the electrical ratings, system type, and stage compatibility (e.g., 2-stage or multistage systems). Ensure your system supports the required wiring configuration. Refer to the manual for specific compatibility guidelines to avoid installation issues. Proper compatibility ensures optimal performance and prevents potential malfunctions. If unsure, consult a professional or the manufacturer’s support resources.
2.2 Gathering Necessary Tools and Materials
To ensure a smooth installation, gather all required tools and materials beforehand. These include a screwdriver, wire strippers, a voltage tester, and mounting hardware provided in the package. The UWP mounting system and decorative cover plate are also essential. Double-check the packaging to confirm all components are included. Refer to the manual for specific tools tailored to your system. Having everything prepared will streamline the installation process and minimize delays.

Installation Process
The Honeywell T6 Pro installation involves mounting the thermostat, connecting wires, and securing the device. Follow the manual’s step-by-step guide for a seamless and efficient setup process.
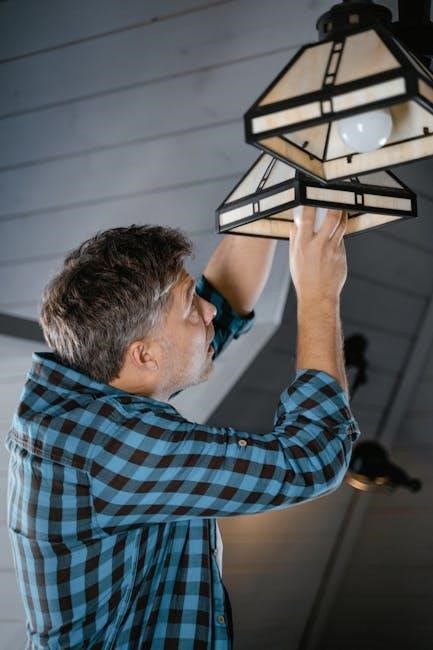
3.1 Mounting the Thermostat
Mounting the Honeywell T6 Pro thermostat begins with preparing the installation area. Ensure the wall is level and clear of obstructions; Turn off the HVAC system’s power supply for safety. Use the provided UWP mounting system to attach the wall plate, ensuring it is securely fastened with screws and anchors. Align the thermostat unit with the wall plate and snap it into place. Verify the thermostat is level and properly seated before proceeding to the wiring connections. This step ensures a stable and accurate installation.
3.2 Wiring Connections
Connect the Honeywell T6 Pro thermostat to your HVAC system by matching the wires to the appropriate terminals on the wall plate. Use the provided J-box adapter if necessary for compatibility with traditional systems. Ensure the power to the HVAC system is turned off before making any connections. Carefully insert each wire into the correct terminal, following the labels (e.g., R, W, Y, G, C). Double-check all connections for accuracy to prevent malfunctions. Refer to the manual or consult a professional if unsure about the wiring configuration.
3.3 Securing the Thermostat
After mounting and wiring, secure the Honeywell T6 Pro thermostat to the wall plate using the provided screws and anchors. Ensure the thermostat is properly aligned with the wall plate for a snug fit. Tighten the screws firmly but avoid over-tightening, which could damage the device. Once secured, the decorative cover plate can be attached to conceal any wiring and enhance the thermostat’s appearance. Double-check the alignment and stability before proceeding to the initial setup.
Initial Setup and Configuration
Power on the thermostat and follow on-screen prompts to set time, date, and preferences. Access Contractor Mode for advanced options. Configure basic settings for optimal performance.
4.1 Accessing Contractor Mode
To enter Contractor Mode, press and hold the Honeywell Home logo for 5 seconds. This unlocks advanced setup options, including system configuration and customization. Use this mode to tailor settings for specific HVAC systems, ensuring optimal performance and compatibility. Contractor Mode allows professionals to fine-tune parameters, enabling precise control over temperature, fan operation, and energy-saving features. This step is crucial for professionals to customize the thermostat for individual system requirements and ensure efficient operation.
4.2 Configuring Basic Settings
After accessing Contractor Mode, configure basic settings like temperature range, HVAC system type, and fan operation. Set the desired temperature, choose between heating or cooling modes, and adjust fan settings for continuous or automatic operation. These configurations ensure the thermostat operates according to your HVAC system’s specifications and personal preferences. Properly setting these basics is essential for reliable performance and energy efficiency, providing a foundation for more advanced features later.
4.3 Connecting to Wi-Fi
To connect the Honeywell T6 Pro to Wi-Fi, access the menu and select the Wi-Fi option. Choose your network from the list, enter the password, and wait for confirmation. Ensure your router is nearby for a stable connection. Once connected, the thermostat will update and sync with the Honeywell Home app, enabling remote control and smart features. A confirmation message will appear once the connection is successful, ensuring seamless integration with your home network.
Advanced Configuration Options
Advanced Configuration Options allow customization of geofencing, smart alerts, and system modes, enhancing automation and energy efficiency for tailored home comfort solutions.
5.1 Scheduling and Overrides
The Honeywell T6 Pro allows users to create custom schedules for heating and cooling, optimizing comfort and energy use. Temporary overrides enable quick adjustments, while permanent holds maintain a set temperature indefinitely. Scheduling can be programmed daily or weekly, with options to override as needed. This feature ensures flexibility, allowing users to adapt their settings without disrupting the overall schedule. Energy-saving modes can also be integrated into schedules for enhanced efficiency.
5.2 Fan and System Mode Settings
The Honeywell T6 Pro offers customizable fan and system modes to enhance comfort and efficiency. Fan modes include Auto, Circulate, and On, allowing precise control over airflow. System modes such as Heat, Cool, and Off provide flexibility for different climate needs. Users can adjust these settings via the thermostat menu or the Honeywell Home app. These modes ensure optimal performance, balancing energy savings and comfort based on individual preferences and seasonal requirements.
5.3 Energy-Saving Features
The Honeywell T6 Pro incorporates advanced energy-saving features to optimize heating and cooling usage. Auto mode adjusts settings based on energy demand, while programmable schedules help reduce unnecessary usage. The thermostat also offers energy reports, providing insights to refine consumption. Features like geofencing and smart recovery ensure efficient operation, lowering utility bills without compromising comfort. These settings can be customized via the Honeywell Home app, making it easy to balance efficiency and convenience.

Troubleshooting Common Issues
Common issues with the Honeywell T6 Pro may include display responsiveness or temperature inaccuracies. Always check power connections and settings. Restarting the device often resolves malfunctions. Consult the manual for detailed solutions and ensure proper installation to avoid recurring problems.
6.1 Resolving Connectivity Problems
Connectivity issues with the Honeywell T6 Pro can often be resolved by restarting the device or checking Wi-Fi settings. Ensure the thermostat is connected to the correct network and the signal strength is adequate. If problems persist, reset the device to factory settings or update the firmware. Verify that the Honeywell Home app is installed correctly and synced with the thermostat. For persistent issues, refer to the troubleshooting section or contact customer support for assistance.
6.2 Addressing Display and Responsiveness Issues
If the Honeywell T6 Pro’s display is unresponsive or showing incorrect information, restart the thermostat by removing and reinserting the batteries. Ensure the screen is clean and free of debris, as dirt can affect touch sensitivity. Adjust the brightness settings in the menu for better visibility. If issues persist, perform a factory reset or update the firmware. Contact customer support if the problem remains unresolved after these steps.
6.3 Handling Firmware Update Errors
If a firmware update fails, restart the thermostat by removing and reinserting the batteries. Ensure a stable Wi-Fi connection and retry the update. If issues persist, perform a factory reset or check for firmware version compatibility. Contact Honeywell support for assistance with unresolved errors. Also, verify that your router is functioning properly and that there are no network interruptions during the update process.
Maintenance and Upkeep
Regular maintenance ensures optimal performance of the Honeywell T6 Pro thermostat. Clean the device, check for software updates, and replace batteries as needed to maintain functionality and efficiency.
7.1 Battery Replacement
The Honeywell T6 Pro thermostat operates on two AA batteries, which typically last up to 2 years. When the display shows a low-battery indicator, replace the batteries promptly. Open the front plate, remove the old batteries, and insert new ones, ensuring correct polarity. Reattach the front plate securely. Use high-quality alkaline batteries for optimal performance. Regular battery replacement prevents system downtime and ensures continuous climate control and connectivity features.
7.2 Air Filter Reminders
The Honeywell T6 Pro thermostat includes a feature to remind you when it’s time to replace your air filter. This feature helps maintain optimal system performance and indoor air quality. You can customize the reminder based on the filter’s expected lifespan or usage. The thermostat tracks filter life and sends notifications through the Honeywell Home app. Regular filter changes improve energy efficiency, system reliability, and air quality, ensuring your HVAC system operates at its best.
7.3 Software Updates
Regular software updates ensure the Honeywell T6 Pro thermostat operates with the latest features and security enhancements. Updates can be performed manually or set to automatic through the Honeywell Home app. These updates improve system performance, add new functionalities, and resolve any potential issues. Keeping the thermostat updated guarantees optimal compatibility with smart home systems and enhances energy-saving capabilities. Always check for updates to maintain peak efficiency and reliability in your home climate control system.