The Presto FlipSide offers a rotating design for evenly baked, extra-thick Belgian waffles, featuring a convenient countdown timer for perfect results every time.
This manual provides detailed flipside waffle maker instructions, ensuring delicious breakfasts and delightful treats are easily achievable with this innovative appliance.
What is the Presto FlipSide?
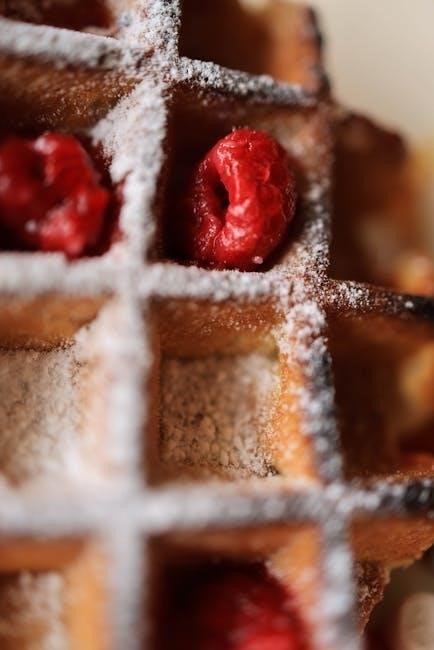
The Presto FlipSide is a Belgian waffle maker distinguished by its unique rotating feature. This innovative design allows for even cooking on both sides, creating consistently thick and golden-brown waffles.
Flipside waffle maker instructions emphasize its ease of use, with a simple operation involving batter pouring, rotating, and baking. The appliance boasts a non-stick surface and a cool-touch handle for safe handling, making it a convenient addition to any kitchen.
Key Features and Benefits
Key features of the Presto FlipSide, as detailed in flipside waffle maker instructions, include its rotating design, ensuring even baking and eliminating the need to manually flip waffles.
Benefits encompass consistently perfect waffles, a built-in countdown timer for precise cooking, and a cool-touch handle for safety. The non-stick grids simplify cleaning, while the compact design allows for easy storage, making it a versatile kitchen appliance.

Understanding the Parts
Familiarizing yourself with the Presto FlipSide’s components, as outlined in flipside waffle maker instructions, is crucial for safe and efficient operation of this appliance.
Waffle Grids: Top and Bottom
The Presto FlipSide features non-stick coated top and bottom waffle grids, essential for creating perfectly formed Belgian waffles. Following flipside waffle maker instructions, ensure batter evenly covers the bottom grid before rotating.
These grids work in tandem during the rotating process, guaranteeing consistent baking and easy waffle removal with a non-metallic utensil. Proper cleaning, detailed in the manual, maintains optimal performance.
Cool-Touch Handle and Locking Mechanism
The Presto FlipSide boasts a cool-touch handle, providing a safe and comfortable grip during operation, as outlined in the flipside waffle maker instructions. A secure locking mechanism firmly joins the top and bottom grids.
To open, turn the handle counterclockwise. This feature prevents accidental openings during rotation and ensures safe handling of the hot waffle maker. Always ensure it’s locked before flipping!
Countdown Timer and Indicator Lights
Flipside waffle maker instructions detail the use of the built-in countdown timer, signaling when waffles are perfectly baked. Indicator lights clearly show when the unit is preheating and ready for batter.
These visual cues eliminate guesswork, ensuring consistent results. The timer automatically signals completion, preventing over or under-baking, and simplifying the waffle-making process.

Preparing the Batter
Flipside waffle maker instructions recommend a basic batter recipe or utilizing pre-made mixes; some packaged mixes may require adjusted baking times for optimal results.
Basic Waffle Batter Recipe
For delicious waffles, flipside waffle maker instructions suggest combining dry ingredients – flour, baking powder, sugar, and salt – in a medium bowl.
Separately, whisk milk, eggs, and melted butter. Gently incorporate the wet ingredients into the dry, mixing only until moistened. Avoid overmixing for fluffier waffles; A one-cup pour onto the preheated grid yields a perfectly sized waffle.
Using Packaged Waffle Mixes
Following flipside waffle maker instructions, packaged mixes offer convenience! Simply prepare the mix according to package directions, noting some may bake faster.
Check waffles sooner than the timer suggests, especially with certain mixes. Pour one cup of prepared mix onto the preheated bottom grid. The rotating design ensures even cooking, regardless of mix type, for consistently golden waffles.
Operating Instructions
Flipside waffle maker instructions begin with preheating, then pouring batter onto the bottom grid. Rotate and flip the maker for even baking, ensuring golden perfection.
Preheating the Waffle Maker
Preheating the waffle maker is crucial for optimal results, according to flipside waffle maker instructions. Simply plug in the appliance, and the indicator light will illuminate. Allow sufficient time for the grids to reach the proper temperature – typically a few minutes.
The timer doesn’t start until preheating is complete, ensuring waffles bake evenly. Opening the unit before preheating finishes may affect the final product’s texture and color.
Pouring the Batter
Following flipside waffle maker instructions, carefully pour approximately one cup of batter onto the center of the bottom grid. Avoid overfilling, as this can cause batter to overflow during cooking. Ensure even distribution for a uniformly cooked waffle.
Close the top grid immediately after pouring, initiating the rotating and baking process. Remember to use a non-metallic utensil if adjustments are needed.
Rotating and Flipping the Waffle Maker
According to flipside waffle maker instructions, the unique rotating feature is key! After closing, gently flip the waffle maker to ensure even batter distribution and consistent browning on both sides.
The cool-touch handle allows for safe and easy rotation. This process guarantees a perfectly cooked, golden-brown Belgian waffle every time, eliminating the need for manual flipping.

Baking the Perfect Waffle
Flipside waffle maker instructions emphasize checking for a golden-brown color and crisp texture to determine doneness. Adjust baking time as needed for desired results!
Determining Doneness
Flipside waffle maker instructions state that waffles are typically done when the green “Ready” light illuminates, signaling the baking cycle is complete. However, visual cues are crucial!
Lift the lid carefully; the waffle should be golden-brown and easily release from the grids. If sticking occurs, extend the baking time slightly. A crisp texture indicates optimal doneness, ensuring a delightful waffle experience.
Adjusting Baking Time
Flipside waffle maker instructions suggest that baking times can vary based on batter consistency and desired crispness. If waffles are pale, close the lid and continue baking for short intervals, checking frequently.
Conversely, if they’re browning too quickly, reduce the baking time. Some packaged mixes may require shorter cycles, so monitoring is key to achieving perfectly golden and fluffy waffles.
Care, Cleaning, and Maintenance
Flipside waffle maker instructions emphasize regular cleaning of the grids after each use, and exterior wiping, ensuring longevity and optimal performance of your appliance.
Cleaning the Waffle Grids
Flipside waffle maker instructions recommend unplugging and cooling the unit completely before cleaning. Gently remove any excess batter with a soft cloth or paper towel. For stubborn residue, use a non-metallic spatula.
Avoid abrasive cleaners or scouring pads, as they can damage the non-stick coating. A damp cloth is usually sufficient; for tougher spots, a mild dish soap solution can be applied carefully. Ensure the grids are thoroughly dry before storage.
Exterior Cleaning
Flipside waffle maker instructions advise wiping the exterior with a damp cloth to remove any splatters or food residue. Never immerse the appliance in water or any other liquid.
Avoid using abrasive cleaners, as they can damage the finish. A mild dish soap solution can be used for tougher stains, but ensure it’s wiped away with a clean, damp cloth afterward. Dry the exterior thoroughly before storing.
Storage Instructions
Flipside waffle maker instructions recommend storing the appliance in a cool, dry place when not in use. Ensure the waffle maker is completely cool and dry before storing it.
Avoid wrapping the power cord tightly around the unit, as this could damage the wiring. Store it loosely or utilize the cord storage feature, if available. Keep the unit out of reach of children.

Troubleshooting Common Issues
Flipside waffle maker instructions address sticking waffles and timer malfunctions. Using a non-metallic spatula helps, and battery replacement resolves timer issues.
Refer to the manual for detailed solutions to ensure optimal performance and continued enjoyment.
Waffles Sticking to the Grids
Flipside waffle maker instructions emphasize ensuring the grids are properly preheated and adequately coated with cooking spray or oil before adding batter.
If waffles still adhere, avoid using metal utensils, as they can damage the non-stick surface. Instead, gently remove waffles with a plastic or wooden spatula. Thorough cleaning after each use, as outlined in the care instructions, also prevents sticking and maintains optimal performance.
Timer Malfunction
Flipside waffle maker instructions detail a battery-operated timer; if it fails to operate, first verify the battery is correctly installed and has sufficient charge.
Refer to the “Replacing the Timer Battery” section for guidance on battery type and replacement procedures. If the issue persists after a battery change, discontinue use and contact Presto’s customer care line for assistance, as further repair may be necessary.

Replacing the Timer Battery
Flipside waffle maker instructions require a specific battery type for timer operation; replacement is straightforward, ensuring continued use of the countdown feature for perfect waffles.
Battery Type and Location
Flipside waffle maker instructions detail that the timer requires a CR2032 button cell battery for optimal functionality. This battery is located within the waffle maker’s handle.
Accessing the battery compartment typically involves removing a small screw on the underside of the handle. Always ensure the waffle maker is unplugged before attempting battery replacement for safety. Proper battery installation maintains accurate timing during waffle preparation.
Battery Replacement Procedure
Flipside waffle maker instructions guide users to first unplug the appliance. Locate the battery compartment on the handle’s underside and remove the securing screw. Carefully remove the old CR2032 battery, noting the polarity (+/-) orientation.
Insert the new battery with the correct polarity, then re-secure the compartment with the screw. Test the timer to confirm proper operation before using the waffle maker.

Helpful Hints for Optimal Results
Flipside waffle maker instructions suggest adjusting batter consistency for best results, and experimenting with flavoring options to enhance your waffles’ deliciousness.
Remember, some packaged mixes may require shorter baking times, so check for doneness frequently.
Batter Consistency
Flipside waffle maker instructions emphasize achieving the right batter consistency is crucial for optimal waffle texture. The batter should be thoroughly moistened, yet not overmixed; a few lumps are acceptable.
Whisk milk mixture into dry ingredients just until combined. Avoid excessive mixing, as this can develop the gluten and result in tougher waffles. A slightly thicker batter generally yields fluffier results when using this appliance.
Flavoring Options
Flipside waffle maker instructions allow for endless customization! Enhance your waffles by incorporating various flavorings directly into the batter. Consider adding a teaspoon of vanilla extract for a classic taste.
Experiment with spices like cinnamon or nutmeg, or even a touch of citrus zest. Berries, chocolate chips, or nuts can also be gently folded in for added texture and delightful flavor combinations.

Safety Precautions
Flipside waffle maker instructions emphasize electrical safety and caution around hot surfaces. Always unplug the appliance when not in use and allow it to cool completely.
Never immerse the waffle maker in water, and use caution when removing waffles to avoid burns.
Electrical Safety
Flipside waffle maker instructions prioritize electrical safety. Always ensure the appliance is plugged into a grounded outlet. Never operate with a damaged cord or plug; seek repair immediately.
Avoid using extension cords if possible, and if necessary, choose one rated for the waffle maker’s wattage. Do not operate the appliance near water or other liquids to prevent electric shock. Unplug when cleaning or storing.
Handling Hot Surfaces
Flipside waffle maker instructions emphasize caution with hot surfaces. The waffle grids and exterior become extremely hot during operation. Always use the cool-touch handle for safe flipping and opening.
Never touch hot surfaces directly; utilize non-metallic utensils for waffle removal. Allow the waffle maker to cool completely before cleaning or storing to prevent burns. Exercise extreme care when operating near children.

Warranty Information
Flipside waffle maker instructions include details on warranty coverage. Presto provides a warranty against defects; contact their customer care line for claim procedures.
Retain your proof of purchase for warranty service, ensuring a hassle-free experience should any issues arise with your appliance.
Coverage Details
Flipside waffle maker instructions emphasize the warranty covers defects in materials and workmanship under normal household use. This does not include damage from misuse, accidents, or unauthorized repairs.
The warranty period begins from the original purchase date. Presto will, at its option, repair or replace the defective appliance. Shipping costs to Presto are the responsibility of the consumer, while return shipping is covered by Presto.
This warranty provides peace of mind, ensuring quality and performance.
How to Claim Warranty
To initiate a warranty claim following flipside waffle maker instructions, contact Presto’s Customer Care line at 1-800-231-9786. Be prepared to provide your model number, date of purchase, and a detailed description of the defect.
You may be asked to send a copy of your purchase receipt. Presto will then issue a Return Authorization number and instructions for shipping the appliance. Do not return the product without prior authorization.
Proper documentation speeds up the process.